Phone:(815) 968-0094 | Contact Us
Laboratory Services & Capabilities

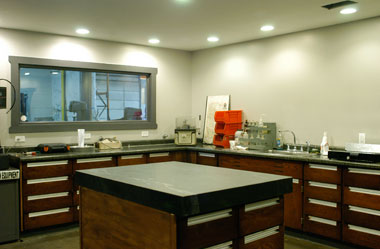
GFI Metal Treating runs state of the art metallurgical testing facility.
We constantly upgrade and improve our capabilities.
- 50+ years of combined experience in the testing field
- Latest equipment and Instruments
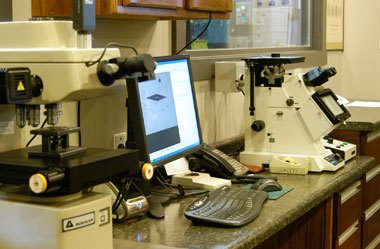
- Latest Automatic Microhardness Testing with Mapping
- Two State of the Art Load Cell Technology UHT Testers
- Variety of large and small metallurgical cutting equipment
- Latest Metallographic Polishing Equipment
- Metallograph with image analysis
- Full Microscopy lab
- All types of portable testing equipment for large parts
Rockwell Hardness Testing:
Hardness testing is a general method for measuring the bulk hardness of metallic and polymer materials. Although hardness testing does not give a direct measurement of any performance properties, hardness correlates with strength, wear resistance, and other properties. Hardness testing is widely used for material evaluation due to its simplicity and low cost relative to direct measurement of many properties. Conversion charts from Rockwell hardness to tensile strength are available for some structural alloys, including steel and aluminum. At GFI Metal Treating our hardness testers are fully equipped with digital readouts and are capable of performing all Rockwell Scales.
Microhardness Testing (Vickers & Knoop):

Microhardness testing is an indentation method for measuring the hardness of a material on a microscopic scale. At GFI Metal Treating our microhardness testers are equipped with automatic stage and dual indenters (Vickers & Knoop). The indenter is impressed into the material at loads from 10 to 2000 gf. The impression length, measured microscopically, and the test loads are used to calculate a hardness value. Our microhardness testing is performed implementing state-of-the-art microhardness testing machines. We are assured of extracting fast, accurate and repeatable test results.
Measuring Effective/Total Case Depth:
Case Depth Analysis
We perform case depth analysis for total and effective case depth. Total case depth is typically measured by sectioning the samples and polishing the surface and etching the sectioned and polished surface with acid to reveal the case depth.
Effective case depth is typically measured by similar procedure with metallographic preparation to a mirror finish. The sample is then placed into the automatic microhardness tester and effective case depth is measured and plotted.
Case depth or case hardening such as carburizing or carbonitriding is specified on many types of parts that require surface fatigue strength and wear resistance. When required by the engineering print it is typically specified with a required case depth. This case depth is specified as either effective or total case. Let us know your needs and we can provide you with fast and accurate results. We can also examine the difference between total and effective case depths in the same component as a measure of the quality of the heat treat operation and granular structure
